Thursday, July 9, 2009

Strawberry, Fool!

Probably the dish that epitomizes summer, to me, is a fool. No, I don't mean that kind of fool. Or even that kind. I mean something that just screams "summer", and that's perfect for anyone, anytime, anywhere. It's decadent, sweet, and basically the most wonderful thing ever invented.

Before you ask, I have no idea why it's called a fool. Until very recently, and due mostly to my sub-par, cereal-box/core French (all you Canadians know what I'm talkin' 'bout), I was convinced it was "foule", i.e. "crowd", maybe because of the "crowd" of fruit in it? Well, now that I now the real name, I have more questions than answers, but don't worry, that doesn't detract from my enjoyment of it.

FOOL

So. Now that you're salivating (I hope), I'm going to make you promise me something before I give you the secret recipe. You must never ever ever under ANY circumstances make this in winter, with those horrible "berries" that cost $6/100g and taste like sawdust. You can ONLY make this when berries are in season in your area, and you have to buy them as local as possible. Ideally from your very own back yard, picked right before you make this. Because really, summer is all about freshness and the beauty of growing things, and fruit that travelled thousands of kilometers to get to your grocery store and doesn't really bear any resemblance to berries fresh off the bush is kind of anathema to that.

Fools can be made with pretty much any kind of soft fruit, like rhubarb, plums, gooseberries, currants, strawberries, raspberries, blackberries... You can also mix and match to suit availability. I prefer fresh berries, either solo or in combination, but I won't say no to fool in any guise. This recipe is for strawberry fool, but it's pretty much the same no matter what kind of fruit you choose. I should quickly note, though, that if you're not using berries or something else really soft and juicy (like extra-ripe peaches or plums), it might be worth it to cut the fruit up bite-size and simmer it with sugar and just a little bit of water. This will soften the fruit and get the juices going, and is especially important with rhubarb. (You should use a lot of sugar with rhubarb.)

I should note, however, that wherever your berries come from, they should be room temperature, to maximize flavour. The cream, on the other hand, should be really cold (not frozen), because it will whip a lot better. SO. The recipe:

Strawberry Fool
Ingredients:
Ripe strawberries (it doesn't really matter how many, as long as the amount of cream you whip can contain them), with a few reserved
Whipped cream* (an amount corresponding to how many strawberries you have)
Sugar, to taste
  • In a medium-sized bowl, mash the strawberries with a fork. You want them kind of chunky, but so that you really have whole strawberry pieces. But I guess it's kind of a matter of personal taste...
  • Drain as much of the juice as possible into another dish. You can always add it back in if you want, but it tends to make everything watery and slightly less than perfect.
  • Add the whipped cream to the bowl and GENTLY fold until combined. If you're too rough with it, the cream will either collapse or (if you're really rough) turn to strawberry butter (which is a post for another day).
  • Give it a taste, and if you think it needs more sugar, add it now, then mix it in (gently)
  • Drink the strawberry juice, because it is just too delicious to waste, and if you do it now, then no one will know they didn't get any.
  • Dish it out and put a couple of the reserved strawberries on top of each helping.
  • DON'T EAT IT ALL YOURSELF! Even though you want to. It's soooo much better when you share it with friends.
*Whipped cream. I know some of you think it comes out of a can. Well I would just like to tell you right now that the stuff in the can is "edible oil product", meaning it has no idea what a cow even looks like, much less spent part of its existence in one. Besides, whipping cream is probably one of the easiest, chefiest things you can do. The only hard part is knowing when to stop. So I'm going to tell you how to do it, old school: no edible oil products involved.
Ingredients:
Whipping cream (also called double cream, 36% m.f.), really cold
Sugar (optional)
Vanilla extract (optional)
  • Put the cream into a bowl (pre-chilled, if you like)
  • Using a whisk, two forks, an electric mixer (with whisk attachments) or a stand mixer (ditto), whip the cream. It will get frothy, then gradually stiffen until it will stand up in peaks if you take the whisk out (turn the mixer off first!).
  • STOP. Immediately. Do not pass GO, do not collect $200. If you whip it too much, it will turn into butter, and this happens very quickly and with very little warning. It's better to have cream that is slightly less stiff than to have butter.
  • It is delicious as is, but if you like you can add a bit of sugar and/or a few drops of vanilla extract. Mix it in with the whisk.
So there you go, two recipes for the price of one. And, for a limited time only, I will throw in a free TIP: if you happen to splash/drop strawberry (or any other fruit juice) on your clothes, immediately remove the affected item and pour hot (preferably boiling) water on to it from a height. This is probably best done in a sink or bathtub (not over your little brother), and be careful not to splash yourself. The stain should come out before your very eyes.

MMMMMMMM

Sunday, June 14, 2009

PAIN AUX BANANES

I've baked a lot of banana bread in my time.

I've been around the block. I know what's up. I've tried banana bread with cake flour, with whole wheat flour, with nuts, with raisins, with rolled oats, with white sugar, with brown sugar, with dulce de leche, with pecans, etc. I've seen it all.

So I think it's about time I shared my knowledge with you.


The recipe I will share is adapted from my grandmother's recipe. I can remember one night last year when I desperately called home searching for it, and had my dad read the steps out to me so I could copy them down. I make this bread all the time, and my copy of the recipe is now stained with batter spots and the ink is bleeding off the page.

I've changed a few things over the months (more nuts, less sugar...), but the general ideas remain the same.

Recipe: Banana Bread
Ingredients:
3 ripe bananas (the skin should have lots of brown specks)
1/3 cup applesauce
1/2 cup brown sugar
1 egg, beaten
1 teaspoon vanilla
1 teaspoon baking soda
1 pinch salt
1.5 cups flour (I used half whole-wheat and half all-purpose)
1/2 cup chopped nuts (walnuts and pecans work well)
  • Prepare your loaf pan. Either butter the pan and dust it with flour, or line it with parchment paper. Preheat oven to 350°.
  • In a large bowl, mix applesauce into mashed bananas.
  • Add sugar, egg and vanilla.
  • Sprinkle baking soda and salt over the mixture, then incorporate the flour and nuts. Be sure to work quickly! If you mix it up too much or stall, the bread won't cook properly.
  • Immediately transfer the mixture into your pan and bake for 45 to 60 minutes, or until the bread is a nice, dark brown color.
  • Let it cool for at least 15 minutes. This is important. The bread is still cooking even though it's out of the oven, and if you cut into it right away it might not ever finish. Ever.
  • Eat and enjoy along with a glass of milk.
Variations: You could add 1/2 cup of rum raisins to the mix, if you're into that. Or blueberries, or chopped apples. Zoe claims chocolate chips also work well, but I don't know if I buy it.


* * * Update: I have modified the recipe once again! Testing has proven applesauce an adequate substitute for butter in this recipe.

Monday, June 1, 2009

Peach-Blackberry Procrastination Pie

I have a habit of baking things to divert myself from studying. This time it's for my summer course on the theory of Probability, which is actually just Calculus and Statistics in a clever disguise. But wait, isn't everything?

I've noted before that I take significant cooking inspiration from what is on special at my local grocery store(s). Yesterday I was quickly drawn in by the blackberries and peaches, which happen to be two of the most delicious fruits ever. Obviously I snatched up as many as I could carry in my book bag and even returned today for more. I ended up with, like, seven boxes of blackberries and two large bags of peaches.

You couldn't expect me to sit around studying with all these fresh fruits lying around, could you? Oh, the temptation.

So I baked a pie. You know, for some study energy.


Last week, I found a used copy of The Joy of Cooking, which has been incredibly helpful. The great thing about this book is its basic explanations of various fruits, breads, grains, etc. I've already used it to figure out how to eat figs, and classify different types of pasta. The illustrations are probably my favorite part. Now I know exactly how to clean a squid, or make a sectioned brioche loaf. And chances are, if I buy some random vegetable and don't know what to do with it, Joy can tell me. She also has an extensive section on pie-baking.

So first off... I'll talk about the pastry.

Before this week, I had been using Martha Stewart's recipe, which turns out to be exactly the same as Joy's recipe. I pretty much always use butter as the source of fat needed for the pastry, but Zoe has told me she uses lard. We might include further discussion on this in a later post. Joy claims you can also use shortening, but... ew.

Recipe: Flaky pastry crust
Ingredients:
2.5 cups flour (I used 1.5 cups unbleached all-purpose and 1 cup whole wheat)
1 teaspoon sugar
1 teaspoon salt
1 cup cold butter (or your preferred source of fat)
.25 to .5 cups ice water
  • Mix the flour, sugar and salt in a large bowl. Cut the butter into small cubes and mix it up with the flour so that it's all evenly distributed.
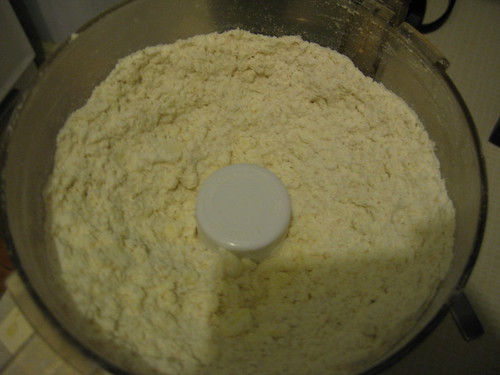
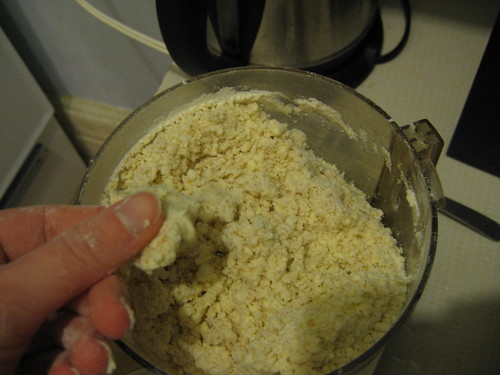
  • Process the flour-butter in a food processor until it resembles "coarse meal". This means it should look like tiny pebbles in sand. The mixture should feel powdery and not greasy. (You can split it up into two batches if you have a small food processor like I have.)
  • With the processor running, slowly pour in the water. Don't add too much--you want the mixture to just barely stick together. Try pinching a little bit between your fingers. If it's still crumbly, add a little bit more water. Be careful not to process it too much. We want to keep the butter in small pebbles.
  • Press all the dough together so it coheres. Then split it up into two discs, kind of like big hockey pucks (lol Canada). Wrap each disc with plastic wrap and refrigerate at least 30 minutes before using. You can also store these in your freezer for up to 6 months, apparently.
Rolling out the dough should be pretty self-explanatory. You just need a rolling-pin, some counter space and extra flour. Lightly flour your surface and rolling-pin. Place the dough-puck on the surface, and roll it from the center out to all directions. You want to try and keep it shaped as a circle, but if it assumes a weird shape you can fix it. Just cut off the protruding pieces and move them to where they need to be. Overlap the edges of the two pieces of dough and roll them back together. Roll the dough out 3-4 inches larger than it needs to be for your pan, and be sure to seal up any cracks before placing it.

I lined my pie pan with parchment paper, only because previous endeavors have exposed it as non non-stick. Greasing the pan with butter should also work--I was just being overly precautious.

You will probably want to make the pie filling while your pie crust is in the fridge, because it takes some time. Please note that you can use the pastry recipe above for lots of different pies! It will work for any sort of fruit pie, pecan pie... whatever.

Recipe: Peach-blackberry filling
Ingredients:
2 cups blackberries (raspberries would also work well)
3 cups peaches (this was about 6 peaches for me, I think.)
0.75 cups sugar
3.5 tablespoons corn starch
1 tablespoon fresh lemon juice
1/8 teaspoon salt
2-3 tablespoons butter, cut into small cubes
  • Peel the peaches and chop them up into small pieces (about 1 cm).
  • Combine the chopped peaches, blackberries and other ingredients (but not the butter yet!!) into a large bowl. Let the mixture sit for 15 minutes, stirring every once and a while.
The point of adding the corn starch is to thicken the filling so that you can actually cut into the pie and eat it with a fork, rather than dumping the whole juicy thing into a bowl and eating it with a spoon (still tasty).

For pie assembly!!!!!!!!!!!!!!
  • Preheat your oven to 400° F.
  • Roll out the first disc of dough and fit it into your (possibly lined) pie dish. Leave that extra dough hanging over the edge for now.
  • Spoon the filling into your pastry, and then sprinkle the cubes of butter (from the filling recipe) on top of all that fruity deliciousness.
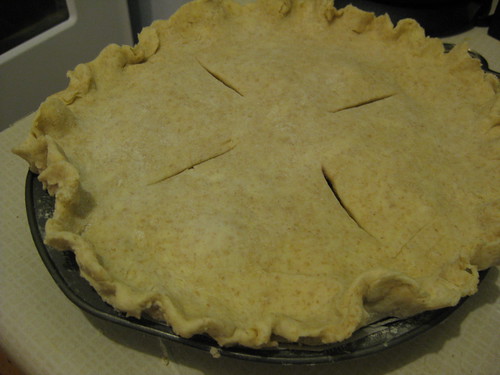
  • Roll out the second disc of dough for the top crust. Brush the overhanging dough of the bottom crust with water or egg, then fit the top crust on. Press the edges together to seal the whole thing up. You can then fashion this crust into various edge designs. Trim any spots that have a huge excess of dough.
  • Brush the top crust with egg or milk, and sprinkle some sugar on it. Cut vents into the top of the crust and pop it in the oven.
  • Bake for 30 minutes at 400 degrees, and then turn the temperature down to 350 and bake for another 25-35 minutes, or until thick juices bubble through the vents. You might want to put a baking sheet on the oven rack below your pie to keep things clean.
  • Try to let the pie cool completely before digging in.

Mmmmm.

Sunday, May 24, 2009

It's Pimm's o'clock!

Well, summer is more or less upon us, and that can mean only one thing: refreshing cocktails. For me, last summer was "the summer of gin", with many still, humid evenings passed with a gin and tonic in hand. This summer, it would appear that the household is branching even further into late nineteenth century colonial British territory and has purchased a bottle of Pimm's. No, not those delicious, jam-filled cookies, but a sort of tonic one drinks while watching one's cricket match. Or else while relaxing in one's pith helmet after a long day of big game hunting under the hot African sun.

The finished product

Mixing up a Pimm's is just about as easy as it gets. And you can change it up to suit your mood, the weather, and the availability of ingredients (except of course the main ingredient, the Pimm's). It's not really worth a recipe, as the basic cocktail is given on the back of the bottle, but I wanted to post about it to get the Pimm's word out there. It's actually one of the best summer cocktails. Like, ever.

So herewith I present to you Pimm's, in all it's glory.
A perfectly Pimm's cocktail
(All ingredients, except the Pimm's, are more or less optional)
1 part Pimm's No. 1 Cup
2 parts tonic water, lemonade, sparkling lemonade or soda water
A shot of gin
A few slices each of cucumber, orange, lemon, strawberries, apple (or any combination of the above)
A few leaves of mint, torn into medium-sized pieces
A few borage flowers, if available
Ice
  • Put all the fruit and veg in the bottom of your serving jug
  • Add lots of ice
  • Measure out 1/3 of the total remaining volume of your jug in Pimm's. Add to jug
  • Add gin, if using
  • Fill the jug the rest of the way with tonic water, lemonade or soda water
  • Mix gently, but well
  • Garnish with mint and borage
  • Serve. As far as I can tell, appropriate Pimm's glasses include a highball glass, a Collins glass, a large wine glass (with or without stem), an iced tea glass or (and this may be pushing it) a champagne coupe. Make sure that each glass gets at least one of each kind of sliced fruit/veg and some ice.
  • Put on your pith helmet, cricket whites and/or handlebar mustache, sit outside somewhere sunny and enjoy the drink that my dad calls "thoroughly civilised"

Friday, May 22, 2009

Green Beans

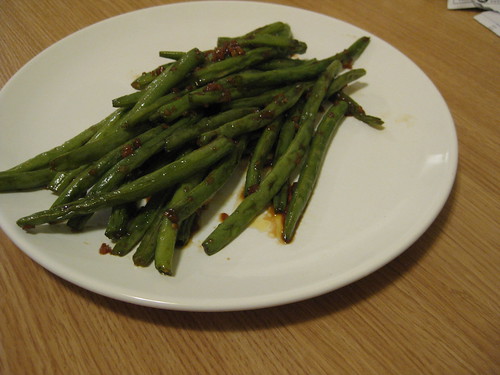
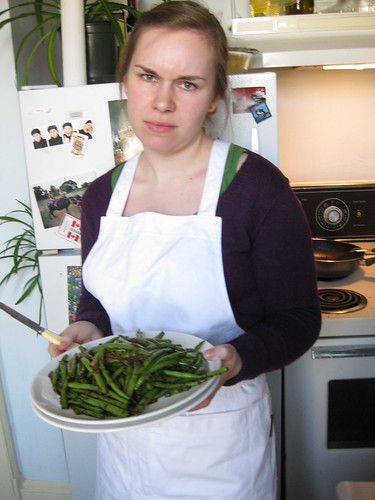
Most illustrious and meritable blog: to you I would like to proffer one of my most celebrated and most highly regarded recipes: green beans with honey-soy sauce. These are not just ANY green beans. Zoe introduced them to me a few months ago, and since then they have become a staple in my diet. I cook these at least once a week. They are like, reeeeeeeeeeeeeeeeeeeeeeally good. And worthy of your appraisal, dear blog.


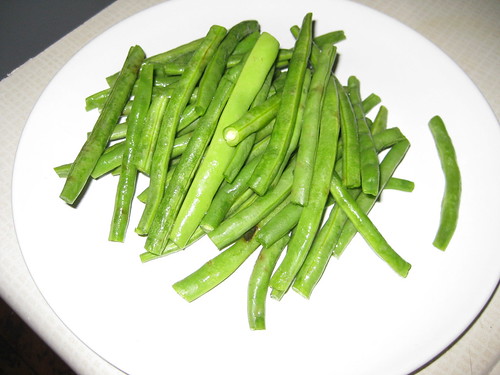
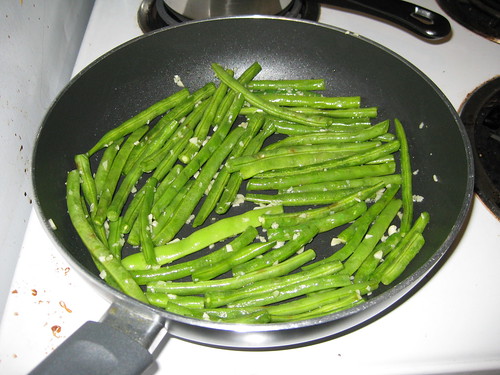
The introduction of this recipe was spurred by a joint trip to the grocery store, where green beans were on mega-sale. Zo and I gathered up a modest bundle of them and created this masterpiece (pictured above). A week or so later, I was desperate to recreate the dish and requested the recipe from Zoe in written form. I've basically kept it the same and added a few notes:
Recipe: delicious green beans

Ingredients:
Lots of uncooked green beans (today I used about 200 grams, but pictured above is quite a bit more, maybe 300-350g).
2-3 cloves of garlic
honey, soy sauce and hot water for the sauce
  • Cut the ends off the beans and mince up the garlic. If you're feeling lazy, Zoe claims you can just slice the garlic and not mince it.
  • Cook the garlic in a frying pan/skillet with ≈ 1 tbsp oil (just enough to cover the bottom of the pan).
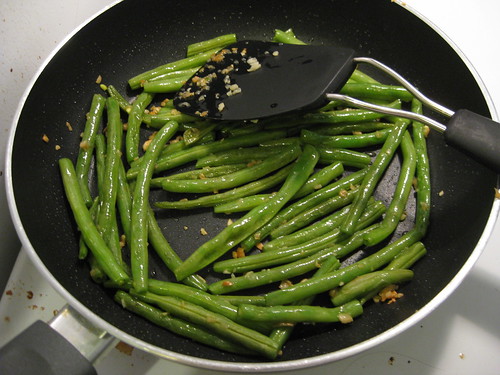
  • Once it's soft (but not brown) add all the green beans and start them cooking. Try to arrange the beans so that they all get some pan space. Cook them until they start to shrivel up, or to your desired done-ness (I prefer them like this, but Zoe recommends that they are brown and shrivelly). In any case, just make sure they are soft enough to absorb some of the sauce.
  • Add the sauce (recipe below!)
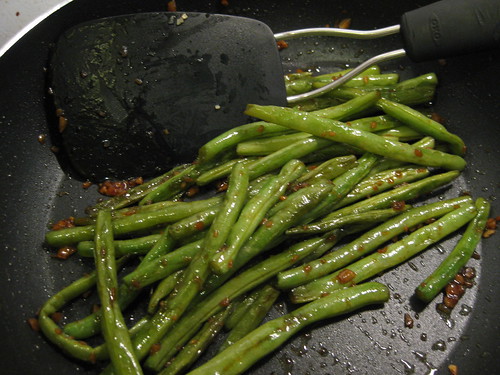
  • Cook over medium high heat for another few minutes, turning the beans every so often to coat them until the sauce turns into a glaze.
  • EAT AND ENJOY.
To make the sauce:
  • Add about half a spoonful of honey and two spoonfuls of hot (boiling water) to a small bowl. Mix to dissolve the honey.
  • Add 2+ spoonfuls of soy sauce. I stopped at 2, but those of you who don't like too much sweetness in your green beans might add more to balance out the honey.
  • If desired (and we usually so desire), add crushed red pepper flakes and/or some of that asian hot chili sauce. By "some," Zoe recommends "a bit more than you think you should."
  • Mix.


If you're feeling really generous like Zoe, you can split them up between a few people. But if you're like me you will just eat all of them yourself.

Friday, May 8, 2009

Deviled Eggs

I'd imagine most of you, while reading about our Easter feast, immediately stopped and thought, "WAIT. THEY ARE MISSING THE MOST IMPORTANT RECIPE!!!!"

You know what I'm talking about. That's right, deviled eggs.


I'm going to admit that prior to our Easter celebration I thought everyone liked deviled eggs. It turns out Zoe and James (our Easter guest) don't, and I am the only deviled egg fan. Which explains why I am writing this post solo.

Usually when I make deviled eggs, I just guess the quantities of every ingredient and don't measure anything. For the benefit of this post, however, I made a special batch and was sure to write everything down. Here is what I've come up with.

RECIPE: Deviled eggs

Ingredients:
2 eggs
1 tablespoon mayonnaise
0.25 teaspoon mustard
1 of those mini-pickles (chopped up really small)
pickle juice (≈ 1.5 teaspoon)
salt and pepper (to taste)
paprika

  • Boil the eggs.
    • HINT: Put the eggs into a pot and fill it with water (the water level should be at least a centimeter above the eggs). Bring the water and eggs to a boil and turn the heating element to low or off. Cover and wait 10-12 minutes before taking the eggs out. They should be hard-boiled, and the centers won't be green and gross-looking.
  • Peel the eggs and slice them in half. Scoop out the yolks and put them into a bowl. Mash up the yolks.
  • Add the mayonnaise, mustard and chopped pickle. The chopped pickle is really key here, since it adds necessary texture. If you're a real mustard fan, you can add more mustard.
  • Add the pickle juice until the mixture reaches the consistency you want. For me this was about 1.5 teaspoons, but it could change depending on how much mustard you've added or whatever.
  • Add salt and pepper to taste.
  • Spoon the mixture back into the eggs and sprinkle with paprika (important!)
    • Note: If you want to try to be fancy and pipe/squeeze the mixture into the eggs through a plastic bag or pastry tip, whatever. Go ahead and do it on your own time, but just don't show up at my doorstep with your eggs looking like that. It's just silly.
  • EAT AND ENJOY.
Makes 4 deviled egg-halves. Feel free to double, or quadruple or otherwise increase this recipe.

Tuesday, May 5, 2009

Easterrific

So. Another semester and all of our finals are now over. One of us (Zo) has left everyone's favourite city to spend the summer with her family in Ontario, then to go on exchange next year, meaning that this blog is going to change a little. Instead of being largely a chronicle of our collective culinary creations, it will be a place for the two of us to share, with you and with each other, our experiences in our own kitchens over the next year and a half or so. But, before that, we have to share our most ambitious, and most successful, undertaking yet: Easter dinner.

The main event

There are a few requirements for Easter dinner, at least chez Zo. Number one: roast lamb. Number two: new potatoes. To make up the rest of the dinner, we decided to use sides that go well with any roast dinner: steamed cabbage and glazed carrots. Finally, somebody has a weird attachment to deviled eggs, which will be their own post, so she made some for her own dinner.

We got up epic-ly early on Easter Saturday in order to head for the market and buy what we would be needing for Monday's dinner. Unfortunately, in our vernal zeal, we got there so early that all the meat-selling stalls were not yet open. We strolled around, bought our herbs and vegetables and, there being still plenty of time before the meat-stalls opened, sat down to an oh-so-European breakfast of chocolat chaud and croissants à l'érable. Eventually, we headed over to the stalls, only to find that the lamb was priced at approximately
$10, 982, 398, 798, 234 /lb. Or something equally out of our price range. So we walked back home and nabbed the last leg of lamb in the grocery store.

Well, having never cooked a roast of meat on our own before, we were understandably apprehensive. We diligently scoured the internet (ok, we searched "lamb" on the BBC food site) and came up with this recipe, complete with video instructions. The recipe for the lamb itself was great, and we stuck with it pretty much 100%, except, because our leg was slightly larger than 2 kilos (it was the only one left in the store, ok?), so we cooked it a bit longer. We were also without a meat thermometer, so we had to go by the handy guide printed onto Eliz's oven, and by how delicious the meat looked. And boy, did it look delicious.

We opted against the gravy included in that recipe, and instead went with a more traditional mint sauce. The recipe we used calls for waaaaaaaaaaaaaaaaay too much mint, so we ended up with waaaaaaaaaaaaaaaaay too much sauce. But oh well, c'est la vie. Here is a relatively good recipe, but remember that, especially with this kind of thing, measures are approximate and you should just do what tastes good.

Mint Sauce for Roast Lamb
A bunch (≈ 5-10g?) of fresh mint
1 tbsp (+) hot (recently boiled) water
1 tsp (+) sugar
2 tbsp (+) vinegar (white wine or cider would work best, but red wine or sherry would also work. Do NOT use white or malt vinegar. You will regret it.)
  • Chop the mint very finely, or use a food processor. If using a food-processor, do not whizz it so fine that it becomes a paste. You want small, reasonably regular, pieces a few millimeters across. It's also ok if they're a bit bigger (like if you're chopping).
  • Put the mint into a small bowl, or whatever vessel you're using to serve the sauce. Pour enough freshly boiled water over it to cover, plus a little bit more.
  • Leave it to steep for 15-20 minutes. You're basically making a mint tea here, which you will flavour, thereby turning it into a sauce. It's like magic!
  • Add sugar and vinegar. Stir to dissolve the sugar.
  • Taste it to make sure it's well balanced. It should be sweet, tart, minty and super-duper yummy. Add more vinegar or sugar (or both) to taste.
So. The roast is in the oven and the sauce is ready to go. Next up: the sides. These all require about the same cooking time which is kind of handy and also kind of frustrating: it's somewhat difficult to prepare three dishes at once. I recommend getting the prep work done before the meat goes in the oven, so that everything can be ready at once. So, in no particular order, I present: The Sides.
Glazed Carrots
500g carrots, chopped
500 ml water
25g sugar
1 tsp salt
50g butter
  • Put all ingredients in an appropriately sized saucepan.
  • Bring to a boil, then turn down to a simmer
  • Simmer for a long time, until almost all of the liquid has gone. It should be a glaze (hence, "glazed carrots"). If you think it's done, leave it a little longer for added deliciousness. The glaze may even begin to caramelize (turn brown and become caramel), which is fine. And scrumptious.
New Potatoes
As many new potatoes (the little ones with the fine skins) as you can eat.
A few more new potatoes, because they are just so moreish, and you can fry them up the next morning for excellent home fries.
Some butter, to serve.
  • Wash the potatoes in cold water and cut out any gross pieces or eyes.
  • Put the potatoes in a saucepan and cover with cold water.
  • Bring them to the boil and keep them there until a fork goes in them easily (they feel as they would if they were on your plate), about 20 minutes.
  • Serve with butter. Yum.
Cabbage
A bit less than half a cabbage (either the curly green kind or the smooth green kind works best, but the red kind is also good), chopped into piece approximately 1 inch by 1 inch
Butter
Salt
Pepper
A tiny bit of lemon juice (optional)
  • Steam the cabbage (covered) until it is soft, about 20 minutes
    • A side note on steaming: boiling will also work, but it makes the cabbage mushy, a little bit smelly, and takes all the nutrients out of it. We didn't have a steamer (a kind of double-boiler, with the inner pot being full of holes, like a colander), so we had to improvise. We took a medium-sized aluminum pie plate (the disposable kind) and trimmed it so that it fit inside our pot. We poked a bunch of holes in the aluminum with a fork and put it in the pot upside down, so that it formed a kind of raised platform on which the cabbage could sit. We put about an inch or an inch and a half of water in the bottom of the saucepan and put the cabbage in on top. Cover it with a lid and presto-change-o, you've made yourself a steamer!
  • Keep an eye on the cabbage, and maybe replenish the water in the bottom with freshly boiled water once or twice during the cooking, to make sure it doesn't boil dry. You also might want to stir the cabbage once or twice (try and flip the stuff on the bottom to the top) to make sure it cooks evenly.
  • Once the cabbage is fully cooked (it will be soft and edible-feeling), drain the water out and put the cabbage into a bowl. Add some butter (as much or as little as you feel is appropriate... although the more you add, the more delicious it will obviously be), plenty of pepper and a bit of salt, as well as a squeeze of lemon juice if you want, and mash it all up really well with a fork.
Serving
This is an extra-special meal, so we think a little extra effort is warranted.
  • Warm up the plates in the oven (but not too hot!) before you serve, to make sure the food stays warm until you can eat it.
  • Use the nicest plates, cutlery and glasses you have
  • Open a really nice bottle of wine. You deserve it after all this work!
  • Arrange the table nicely and light some candles (hey, we're students, ok? Not all of us have space or money for candlesticks, or serving dishes... or chairs)
  • Dress up in nice Easter-y clothes!
  • Listen to some Easter-appropriate music
  • Enjoy with friends or family who are just as excited about this meal as you are!